I started the day by stacking and filling the cakes that were going to make up the lamp base. I used the corer tool from the Tall Tier Stand to cut holes in the centers of the the cake layers. I, somehow, was an idiot and didn't cut them all the same (no idea how that happened!)....but, managed to get them stack and iced and you really can't tell, lol. After leveling, torting and cutting last night, I had twelve 1" cake layers that were approx 6"x6". I decided to use three cake layers and two layers of filling per small cake. I then decided to use three of the small cakes to comprise the lamp base.
I also decided, for support purposes, to put a cardboard between each of the small cakes, with bubble tea straws as support underneath the cardboard. I covered the cardboard with Glad Press N Seal (love that stuff!!!) and cut out the hole in the center. Here's a tip....when pre-cutting cardboard for your cakes, don't assume a 6" square cake is actually going to be 6"square (who'd a thunk it!). Turns out the cake is more like 5.5" square, and you now have to trim the cardboard.
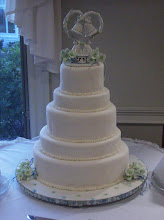
Here is the cake mid-stacking:

and here is the lamp base all stacked and crumb coated:

Turns out I did not need to make nearly the amount of filling that I did....I have at least half of it leftover! I bagged it up and stuck it in the freezer - no way I'm throwing that stuff out!

While I waited for the crumb coat to crust on the lamp base, I pulled out the lamp shade. I had hoped that I would be able to sand it and cover it in fondant. I did sand it, and even made a template of the lamp shade, with wax paper. I kneaded and rolled out the fondant, and then attempted to attach the fondant to the lamp shade. SOMEHOW the fondant was too small! I couldn't figure out how since I followed the template I made. Anyway, by then, I was in no mood to re-knead and re-roll the fondant. Plus, the fondant was ripping when I tried to put it on the shade. I was able to smooth a piece of fondant into the top of the lamp shade to cover the RI in there.
Now, I had a dilemma.....how the heck to cover the shade, because quite frankly, it looked like crap, lol. I reached for the left over Royal Icing and attempted to apply and smooth it onto the lamp shade. In retro-spect, I should have thinned the RI down a little bit, but oh well, what's done is done. I smoothed it onto the lamp shade with my icing spatula, and since I needed it to dry quickly, I set it into the oven (gas oven, pilot on).
I ended up doing a second cake to ensure there were enough servings. See....I am usually asked to cut the cakes that I make, and *I* know how to cut the lamp base to produce 40-45 servings.........however, if someone else cuts it, there may not be! Since I had one of the smaller cakes leftover, I decided to decorate it to bring to the shower also. I spent a bit of time contemplating what I should make it look like (I hate boring, lol). I finally decided to decorate it to look like a basket with diapers in it. It was pretty simple. I had already crumb coated and iced the cake. I took a large round tip and piped lines on the top of the cake to simulate the folded diapers, then used buttercream to pipe a basketweave on the sides of the cake. I finished it off with a straight star-tip board and corners, and a zigzag on top.

By now, the lamp base had crusted. My intention had been to cover with fondant, however, given the issues with the lamp shade, I opted to ice in buttercream. I slathered icing all over the lamp base, then smoothed it out and even got some nice looking corners! I got it all iced, and needed to put the design on the front of it. My original idea was to hand paint it on, but that's kind of tough on buttercream. So, I took a toothpick, and hand drew the design on the side of the lamp base, using a picture I took as a guide. I then took some dark brown and piped all the outlines. Then took some lighter brown to fill in some of the areas of the design.

Then I put the 'top' on the lamp base.

By now, the shade was dry in the oven, so I took it out and attempted to sand the royal icing. It was a no-go this time....but, I had an idea and tried it to see what would happen. I sprtized the lampshade with water, and then used the sanding sponge to wetsand the lamp shade. It actually worked!!!. I decided to finish off the lamp shade with some brown zigzags around the top and bottom bands, and also on the top of the lamp. I also decided to pipe some curly-q's on the lamp shade. I wasn't in the mood to do the diagonal lines on it.

No picture yet of them stacked up, that's for tomorrow at the shower. However, I had some fun with the camera and ended up with this cool shot!

No comments:
Post a Comment